A Guide for Beginners
Tufted rugs are a wonderful way to show off your creativity and add a special touch to your home. Whether you’re a crafty pro or new to DIY projects, tufting rugs can be fun and fulfilling. This guide covers tufting rug basics, from essential tools to step-by-step instructions for crafting your own masterpiece.
What’s Tufting?
Tufting is a traditional way to make rugs. It involves pushing loops of yarn or fabric through a base material like a canvas or fabric-covered frame. This creates patterns and textures, resulting in amazing rugs that match your home’s look. To learn more about about tufting and it history check out Exploring Tufting – An Artistic Adventure into the World of Textile Crafting.
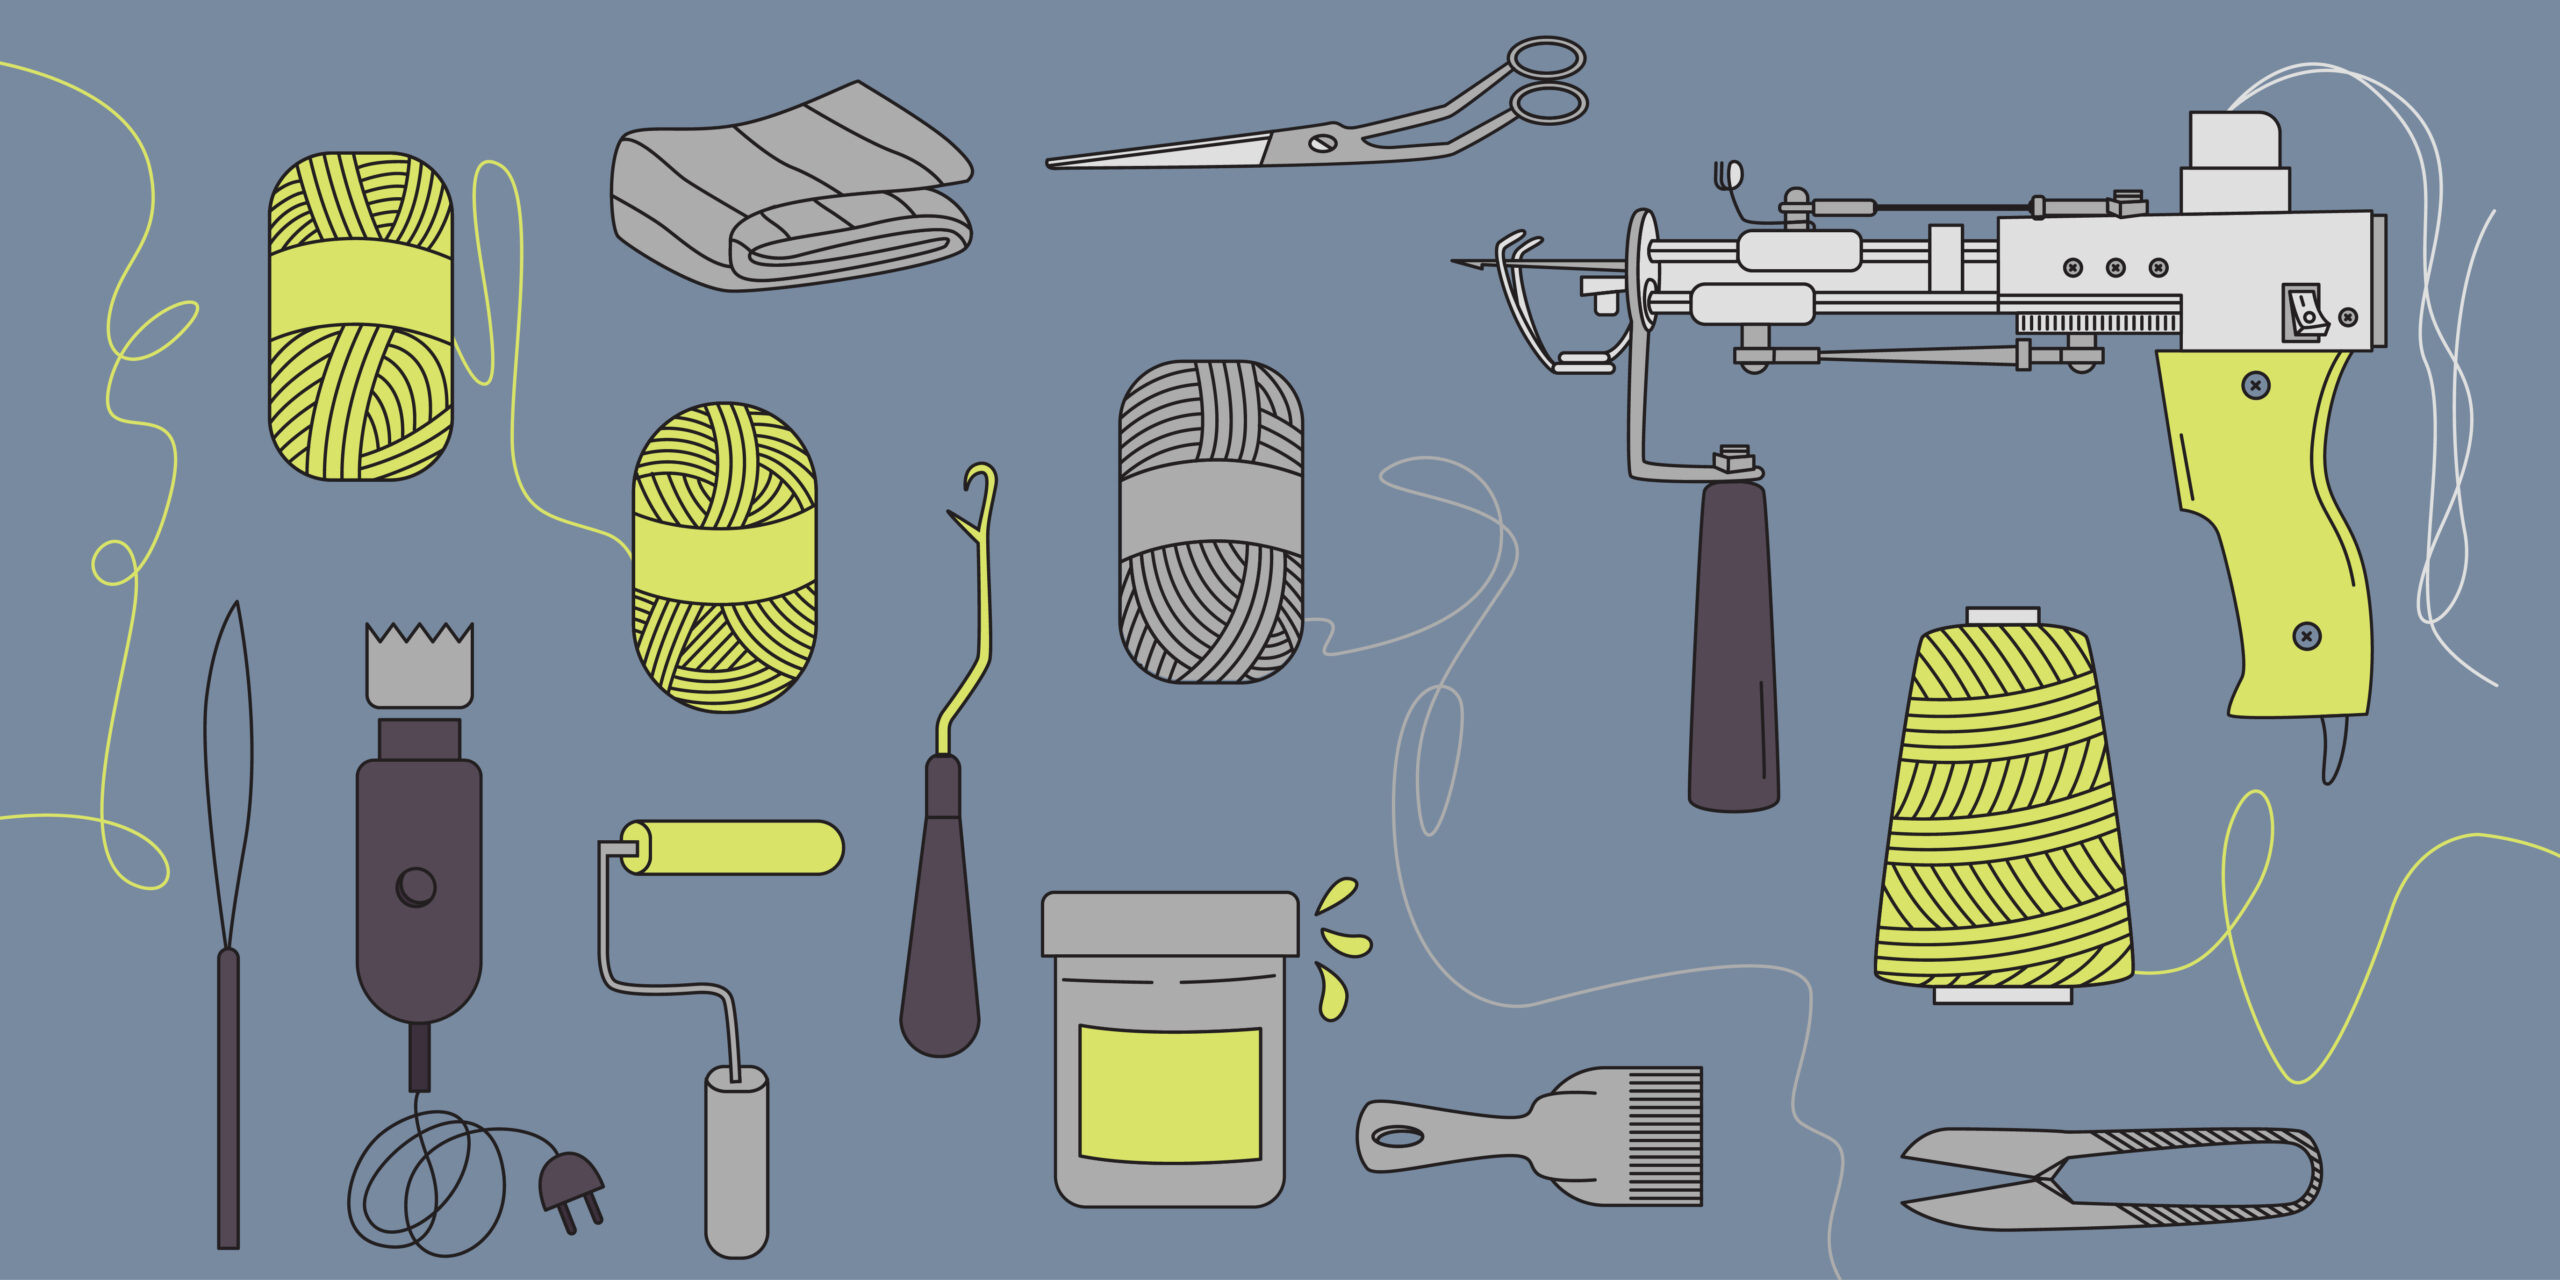
What You’ll Need
Before you start, gather these tools:
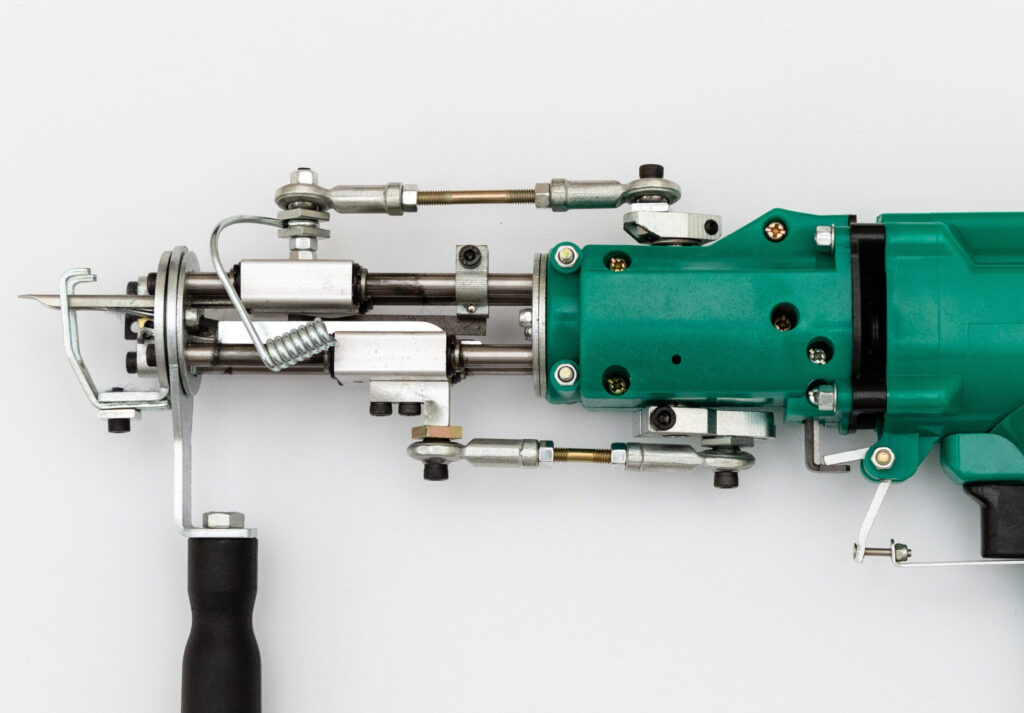
- Tufting Gun: This tool is key for tufting rugs. It helps you quickly and evenly put yarn or fabric loops into the base material.
- Base Material: Choose sturdy fabric or canvas for your rug’s base. It should handle tufting and daily use.
- Yarn or Fabric Strips: These make up your rug’s pile. Pick colors and textures that fit your home’s style.
- Rug Frame or Hoop: These hold the base material tight, making tufting easier.
- Backing Material: You need this to keep tufts secure and stop them from coming apart. Latex or rug backing works well.
- Scissors: These help trim extra yarn and give a clean finish.
- Design Template: If you’ve got a design in mind, a template or pattern helps guide your tufting.
Step-by-Step Tufting
- Base Prep: Stretch the base material on the rug frame or hoop, making it tight and secure.
- Design Plan: If you’ve got a design, put it on the base material with a washable marker or chalk.
- Load the Tufting Gun: Fill your tufting gun with yarn or fabric strips. Follow the instructions to do it right.
- Tufting: Put the tufting gun against the base where your design starts. Press the trigger to push yarn or fabric through, making loops on the other side. Keep doing this, adjusting the gun for loop length and density.
- Design Progress: Stick to your design template or go with your own ideas. Try different colors and textures for the look you want.
- Finishing: Once your tufted design is ready, trim any extra yarn or fabric loops for a neat look.
- Tuft Securing: Use backing material (latex or rug backing) on the back of the rug. This stops tufts from coming out.
- Final Trim: If the backing goes beyond the base, trim it.
- Finishing Touches: Clean the rug, check for loose tufts, and fix anything needed.
- Show It Off: Your tufted rug is ready for your space. Put it where everyone can see and enjoy your handmade decor.
Success Tips
- Start Simple: If you’re new to tufting, try an easy design to get the hang of it.
- Be Patient: Tufting takes time, but the end result is worth it. Take breaks to stay calm.
- Try Textures: Mixing yarn textures adds depth and interest to your rug.
- Keep It Even: Make loop lengths and tuft density the same for a polished look.
- Love Flaws: Handmade rugs have charm. Don’t worry about small imperfections.
Conclusion
Tufting rugs is a fun craft that lets you put your touch on your living space. With the right tools, materials, and some patience, you can make beautiful rugs that show off your style. Whether you like complex patterns or bold designs, tufting lets your creativity shine. Get your supplies, let your ideas flow, and start your tufting journey toward your own unique masterpiece.